Product Intrduction
Waygo Cement Repair Mortar is a high-tech, single-component cement-based repair product specially formulated to address defects in cement concrete pavements, including pitting, hollow spots, spalling, delamination, cracks, exposed reinforcement, freeze-thaw damage, and exposed aggregates. It can be applied directly onto the distressed area, providing excellent compressive and bond strength. The material enables thin layer repairs and rapid restoration for traffic reopening. Under high-speed and heavy-load traffic conditions, it resists cracking or debonding. It withstands temperatures from -40°C to 80°C and is suitable for all types of cement concrete surface distresses.
Waygo Cement Repair Mortar Application Scope
Waygo Cement Repair Mortar application is suitable for all cement concrete surfaces, including but not limited to: highways, factory floors, parking lots, industrial parks, service areas, driving schools, gas stations, warehouses, garages, bridges, steps, terraces, roofs, and both interior and exterior environments.
Waygo Concrete Repair Mortar Application Steps
1. Pre-Construction Preparation
Materials: Ensure that the Waygo Cement Repair Mortar is within its shelf life and the packaging is intact.
Equipment: Mortar mixer or modified electric drill (hand mixer), high-pressure water washer, scarifying device or milling machine, substrate cleaning tools, sponge or dry mop (for removing excess water), at least two mixing buckets, multiple trowels, spike roller (for de-aeration), and a notched trowel.
Environmental Requirements: Ambient temperature must be above 5°C. Do not apply during rainy conditions. Avoid application in extreme heat or direct strong sunlight when possible.
Personnel: Personnel shall have prior experience in cement concrete construction and shall familiarize themselves with this product’s instructions before application.
2. Substrate Preparation & Cleaning
Cleaning: Remove all loose material from areas of blistering, scaling, cracking, and delamination. The cleaner the substrate, the stronger the bond achieved with the repair mortar.
Scarification: For depressions shallower than 3 mm, excessively smooth surfaces, oil-contaminated areas, and power-troweled finishes, mechanical scarification with a milling machine is mandatory prior to application. Surface roughening must always be performed using either a scarifying device or a heavy-duty pointed hammer to create a rough contact surface and enhance adhesion.
① Depression ≤ 3 mm (shallow pit): No pre-filling required. Simply roughen the surface by scarification, then proceed with thin-layer repair.
② Depression > 10 mm (deep pit): Scarification alone is insufficient. Pre-fill and level using repair mortar mixed with clean coarse aggregate (gravel with a particle size of approximately 5 mm). This controls shrinkage, reduces cost, and provides structural stability for thick repairs.
Why add aggregate for depths > 10 mm? Thin-layer mortars have a high proportion of fines and hydraulic binders. Applying a thick layer in one lift results in significant internal shrinkage during curing, generating tensile stress that causes map cracking and delamination. Clean crushed stone provides inter-particle support, substantially reducing overall shrinkage and suppressing cracking. It also lowers material cost and improves deformation resistance.
Sweeping & Washing: Sweep away all loose dirt and debris. Flush thoroughly with high-pressure water, directing the slurry out of the work area and preventing backflow. The surface must be completely free of sand, grit, and dust to ensure a strong bond between the Waygo Cement Repair Mortar and the sound substrate.
3. Substrate Saturation
After washing, saturate the ground completely using a high-pressure water jet. Apply water repeatedly until the surface no longer absorbs it. The ideal condition is reached when no air bubbles emerge from the surface, indicating full saturation.
This step is crucial. If the ground is not properly saturated, the dry substrate will rapidly draw moisture from the applied mortar, compromising bond strength and leading to delamination and cracking. In practice, it is recommended to begin scarification and washing the day before construction, then continue soaking for an additional 20 minutes on the day of application, observing the substrate until no bubbles appear.
4. Removal of Free Water
Use a sponge or dry mop to remove all standing water and puddles from the surface. The substrate must remain damp but free of any visible free-standing water throughout the entire operation. This prevents material dilution, bubble formation, and strength reduction. Leaving standing water in depressions will cause the moisture content in those areas to be excessively high, reducing the strength of the repair layer.
5. Primer Application (Optional)
If conditions permit, apply a bonding agent or concrete surface hardener (primer) using a cross-hatching method — one horizontal coat followed by one vertical coat — for a total of two coats. This enhances the bond between the repair mortar and the substrate.
6. Mortar Mixing
Water Ratio: Mix one bag (25 kg) of Cement Repair Mortar with 4.0–4.5 kg (liters) of potable water, corresponding to a water-to-powder ratio of 16%–18% by weight. An 18% ratio yields optimal results. Start with 4.0 kg (16%); if the mix is too dry to work, increase gradually — but never exceed 4.5 kg (18%). Excessive water reduces bond strength and causes anti-crack fibers to float to the surface.
Procedure: Always add water to the mixing container first, then introduce the dry powder. Weigh the water before mixing. Add approximately three-quarters of the total water to the bucket, pour in the powder, then add the remaining one-quarter. Never add powder first and then water, as this results in uneven mixing.
Mixing: Use a mechanical mixer (electric drill with mixing paddle) to blend for approximately 3–5 minutes until a homogeneous, lump-free, and bubble-free consistency is achieved. If dry powder lumps or air pockets persist, let the mix rest for 1–2 minutes, then stir slowly to release trapped air bubbles. Avoid overmixing.
Pot Life: The mixed mortar must be used within 15–20 minutes of mixing. The material begins its hydration reaction upon contact with water and starts setting after approximately 15 minutes. Due to the short working time, batch sizes should be kept small. Each batch should be consumed within 15 minutes based on the work area and progress rate.
7. Mortar Application & Finishing
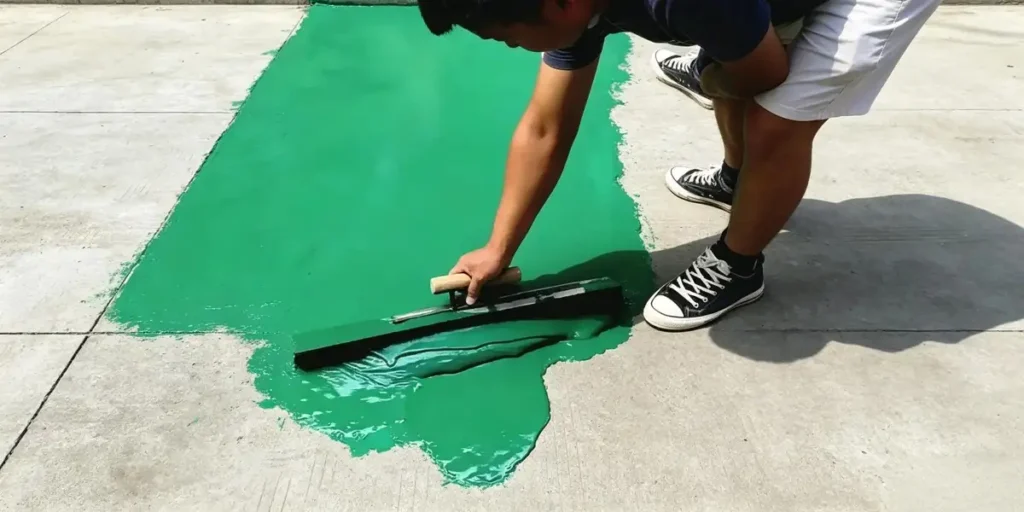
Pour the mixed mortar onto the prepared substrate. Use a notched trowel to spread and level the material at a thickness of 3–5 mm. Hold the leading edge of the trowel at approximately 10° to the surface and minimize the number of passes, as excessive troweling causes sticking and leaves marks.
If additional leveling is needed, wait 2–3 minutes before troweling again. Immediately after troweling, use a spike roller to eliminate entrapped air bubbles. Complete the entire application process within 20 minutes to avoid the mortar beginning to set, which would hinder proper spreading.
At the bond interface, first apply a thin scratch coat to ensure all surface irregularities are in full contact with the material, then build up to the required thickness. For deep potholes, avoid placing the full depth at once; use successive lifts to achieve density and uniformity. All lifts must be placed continuously without interruption, as delays will cause delamination between layers.
Important: Do not steel-trowel or power-float the surface as you would with conventional concrete. The material’s short initial set time and stickiness make finishing difficult — screed level in as few passes as possible. Operators are advised to practice on a small test area first to become familiar with the material’s behavior before proceeding to larger areas.
8. Crack Repair Procedure
For cracks narrower than 3 mm (fine hairline or narrow cracks), the crack must first be widened and routed to create a workable repair groove. Narrow cracks are difficult to fill completely to the bottom, often resulting in voids and delamination. Routing removes loose debris from within the crack, creates a mechanical interlocking profile, increases the contact area for bonding, ensures full embedment of the repair material, and effectively prevents debonding and secondary cracking.
For deeper cracks, use a saw cutter to cut the ground into an inverted V-shaped groove (V-notch), fully exposing the bottom of the crack to create a sound, clean working surface. This ensures the repair material completely fills the cavity from the bottom up and forms a strong mechanical interlock with the surrounding concrete. Clean the groove thoroughly after cutting before proceeding with placement.
▶ Prefer a V-shaped groove over a simple straight-line cut.
▶ After routing, thoroughly blow out all dust with compressed air.
▶ Dampen the groove and ensure no standing water remains before applying the repair mortar.
▶ For larger cracks, it is recommended to add crushed stone or coarse aggregate to the mix to enhance strength.
9. Deep Pit Repair (> 10 mm)
For depressions deeper than 10 mm, scarification alone is insufficient. First perform leveling and filling using repair mortar mixed with clean coarse aggregate (gravel with a particle size of approximately 5 mm) to fill the deep void. After the deep fill has set, proceed with the standard thin-layer repair mortar as the surface layer. This approach addresses three key concerns: shrinkage control, cost reduction, and structural stability.
10. Control Joint Cutting (Large Areas)
After completing large-scale continuous repair work, saw-cut control joints must be installed. The repair mortar undergoes drying shrinkage during curing, while the pavement is also subjected to thermal expansion and contraction stresses year-round. Without pre-installed joints, these stresses cannot dissipate, leading to random cracking. Artificially cut joints provide predetermined stress-relief pathways, controlling where cracks occur and ensuring long-term integrity of large repaired areas.
For scattered small repairs (within a few square meters), saw cutting is generally not required. Only for extensive, continuous overlay projects is joint cutting mandatory.
11. Curing
▶ In hot summer conditions, lightly spray water for curing at 2 hours and again at 4 hours after placement.
▶ For outdoor applications in general, curing water sprays should be applied at 30 minutes and 90 minutes post-placement.
▶ After approximately 6 hours of natural curing, the surface becomes walkable.
▶ If the surface appears excessively dry at any point, re-moisten it by lightly sprinkling or spraying water.
▶ For maximum service life, continue light water curing for 3–5 days where time and conditions permit.
12. Opening to Traffic
Repaired sections can reopen to traffic within 6 hours at room temperature (within 4 hours in summer). However, if time permits, it is highly recommended to delay vehicular traffic until the following day, as this effectively extends the service life of the repair.
Waygo Cement Repair Mortar Application Precautions
1. Substrate cleanliness is absolutely critical. Applying this product to a loose or unstable base will result in cracking or fragmentation, analogous to building a tall structure on a weak foundation. Proper substrate preparation to eliminate all looseness is non-negotiable.
2. Strictly control the water ratio. Excessive water reduces bond strength, causes sand particle segregation, and leads to anti-crack fibers floating to the surface.
3. The substrate must be fully saturated before application. If the ground is not properly soaked, the original substrate will absorb moisture from the repair mortar, causing bond strength to drop and leading to delamination and cracking.
4. No standing water may remain on the surface during application. Remove all ponded water with a sponge or mop. The substrate must be damp but free of visible free-standing water.
5. Never mix by dumping material on the ground and stirring with a shovel. Always use a mixing bucket and an electric mixer. Mixing on the ground introduces contamination and produces an uneven, unreliable mix.
6. Do not steel-trowel or power-float the surface as with conventional concrete. The material’s short initial set time and stickiness make this counterproductive. Screed level in as few passes as possible.
7. Once the material begins setting (after approximately 15 minutes), do not rework or re-trowel the surface, as this will leave permanent marks and disrupt the setting process.
8. For multi-layer or deep repairs, all lifts must be placed continuously without interruption. Delays between layers will cause delamination.
9. For deep pits greater than 10 mm, always add coarse aggregate (approximately 5 mm particle size) to the mix. Filling deep voids with pure repair mortar risks excessive shrinkage, map cracking, and delamination.
10. For cracks narrower than 3 mm, always widen and route the crack before filling. Direct application into narrow cracks results in voids and debonding For deeper cracks, always use a saw cutter to cut an inverted V-shaped groove that fully exposes the bottom of the crack before filling..
11. Do not apply at temperatures below 5°C or during rainy conditions.
12. Prepare all substrate work (cleaning, scarification, saturation) before mixing the mortar. Once the material is mixed, the clock starts — have everything ready to proceed immediately.
PACKAGING & COVERAGE
Specification: 25 kg/bag.
Coverage: Recommended application thickness: 3–5 mm. One 25 kg bag covers approximately 5 m².
Working Time: 20 minutes after mixing.
Shelf Life: 6 months. (In general, it can still be used even after 6 months. When stored as described below, its shelf life can be extended to over 12 months.)
Manufactuirer: BOSLAI
STORAGE & SAFETY
1. This product is eco-friendly and non-flammable.
2. Place wooden pallets on the ground and wrap them entirely with a large plastic sheet. Keep them 1.5 meters away from the warehouse walls, sealed off from the air to block moisture. With a well-ventilated and dry warehouse, the material can be stored for one year. In the afternoon, when it snows, the walls will absorb and emit moisture; if the material is placed too close, it will absorb that moisture.
Join Our Distributor Network
We’ll get back to you within 24 hours. Emails occasionally end up in the spam folder, so we kindly ask you to provide your WhatsApp so we can reach you urgently if needed.